I really like a fabric banner my friend has in her house and was toying with the idea of making my own. Then I saw another one on Stephanie Lynn’s website (which is totally awesome and I’m going to make her skewer starburst mirror soon…I’ll post the results) and thought “darn it, I’m doing it, I’m making one”. I have these windows around our bathtub where I usually hang a Christmas garland during the holidays and every year when I take it down, the bare walls just glare at me.
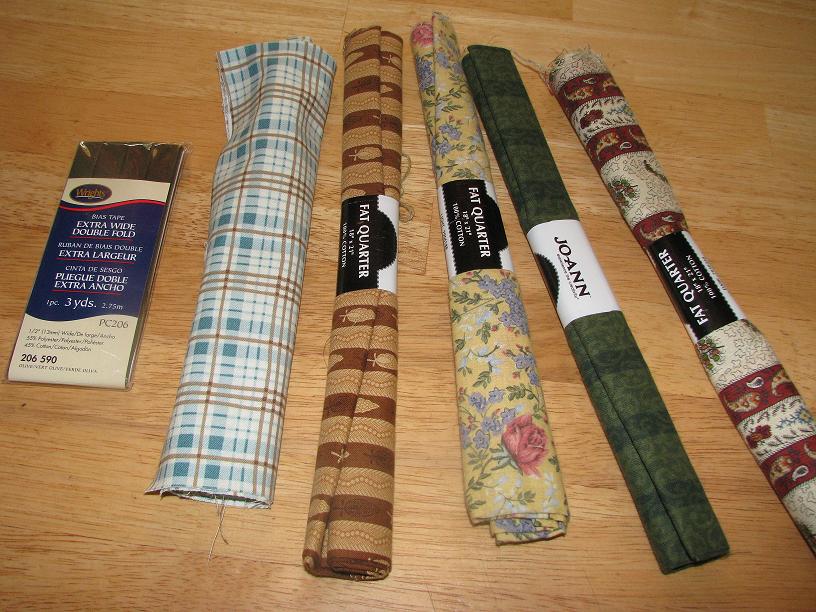
So off to Jo-Ann Fabrics I went with my 40% off coupon in hand. I picked out these 5 fabrics in the “fat quarters” section and a package of extra wide double fold bias tape in olive. I paid $7.73 for everything after coupons.
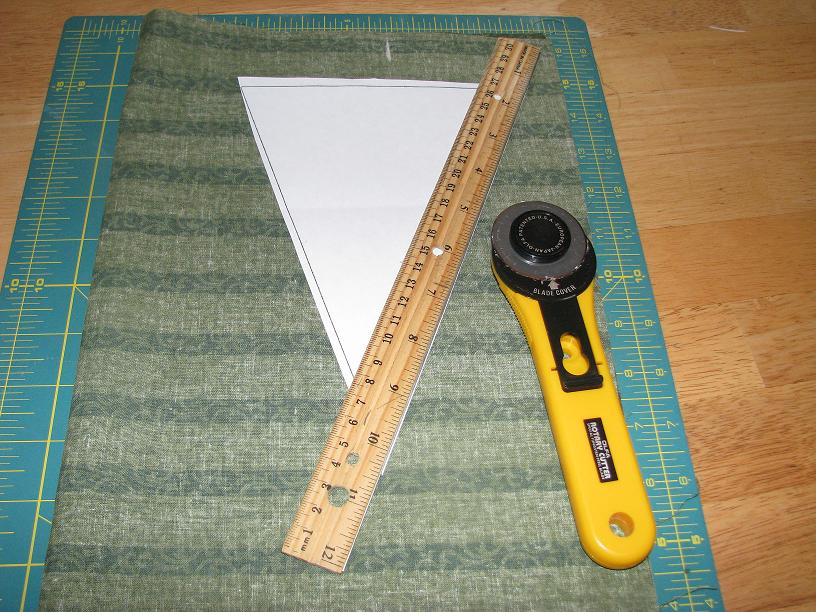
I cut a triangle out of a piece of paper approximately 6″ wide and 8″ long to use as a template. I ironed each piece of fabric, then folded it in half, right sides together, and ironed it again. I used a cutting mat, rotary cutter, ruler and triangle template to cut out each triangle. I didn’t use any pins or draw any lines, I just winged it.
Once all the triangles were cut out (I cut out 10 triangles – 2 from each piece of fabric – but I messed one up, so I ended up with 9), I then sewed along the two sides of each individual triangle.

Once sewed, I turned the triangles right side out and used a pencil to straighten out the points and then ironed them flat. I ironed the bias tape to make it look smooth (note: bias tape comes folded, I did NOT open it up and iron the fold, I only ironed the tape to get the creases out from being packaged). I folded the bias tape in half (end to end) to find the middle point and then unfolded it and layed it out on the floor. I lined up the middle of the top edge of one triangle with the middle point of the bias tape, and then arranged the rest of the triangles, moving them around until I liked the order they were in. I opened up the bias tape and inserted the flat, unsewn edge of each triangle top. I closed the bias tape and pinned the top edge of the triangle inside. I just “eyeballed” the spacing between triangles. When all the triangles were pinned to the bias tape, I sewed along the entire length of the tape, catching the triangles that were tucked inside. When I tacked it up on my bathroom wall to see how it looked, it was too long, so I ended up taking one of the triangles out. I also folded over the bias tape and sewed it to make a loop on each end and then cut off the extra tape. Here’s the finished product…..I like it!


It took about two hours to make. Of course I always get inspired at the weirdest times to get crafty and this was during dinner time (I didn’t want to stop so we had sandwiches). I am also not the greatest seamstress…luckily, this was nothing but straight lines. But I would like for you to meet my new BFF….she came in handy more than once.
If you aren’t into sewing, All You has a no-sew banner that’s really cute too.
.